- 浏览: 868719 次
- 性别:

- 来自: 北京
-

最新评论
-
luna_2006:
...
【Java】枚举类型Enum介绍和方法详解 -
沙漠孤影:
...
【Android】Android Market 链接的生成与分享 -
sjl_008:
有错误,inSampleSize 为2时,图片大小不是原来的2 ...
【Android】如何解决bitmap 内存溢出out of memory的问题 -
huanglei_jay:
【Java】Collections.EMPTY_LIST和Collections.emptyList()简单使用心得 -
wuxuewujiang:
很详细!很有用的整理。
【Objective-C】NSDate详解及获取当前时间等常用操作
前面的一篇文章《iOS开发16:使用Navigation Controller切换视图》中的小例子在运行时,屏幕上方出现的工具栏就是Navigation Bar,而所谓UINavigationItem就可以理解为Navigation Bar中的内容,通过编辑UINavigationItem,我们可以使得在Navigation Bar中显示想要的东西,比如设置标题、添加按钮等。
这篇博客将会以一个小例子来演示如何设置UINavigationItem。
现在我用的是Xcode 4.3,在使用上跟Xcode 4.2差不多。
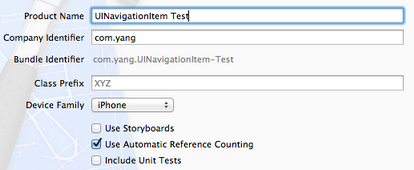
1、首先运行Xcode 4.3,创建一个Single View Application,名称为UINavigationItem Test:
2、其次,我们要使得程序运行时能够显示Navigation Bar:
2.1 单击AppDelegate.h,向其中添加属性:
@property (strong, nonatomic) UINavigationController *navController;
2.2 打开AppDelegate.m,在@synthesize viewController = _viewController;之后添加代码:
@synthesize navController;

#pragma mark -
#pragma mark Application lifecycle
2.3 修改didFinishLaunchingWithOptions方法代码如下:
- (BOOL)application:(UIApplication *)application didFinishLaunchingWithOptions:(NSDictionary *)launchOptions
{
    self.window = [[UIWindow alloc] initWithFrame:[[UIScreen mainScreen] bounds]];
    // Override point for customization after application launch.
    self.viewController = [[ViewController alloc] initWithNibName:@"ViewController" bundle:nil];

    self.navController = [[UINavigationController alloc] initWithRootViewController:self.viewController];
    [self.window addSubview:navController.view];

    [self.window makeKeyAndVisible];
    return YES;
}
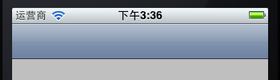
此时运行程序,会发现出现了Navigation Bar:
下面讲一下关于NavigationItem的简单设置。
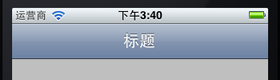
3、设置标题:
打开ViewController.m,在viewDidLoad方法中[super viewDidLoad];之后添加代码:
self.navigationItem.title = @"标题";
运行:
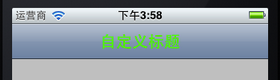
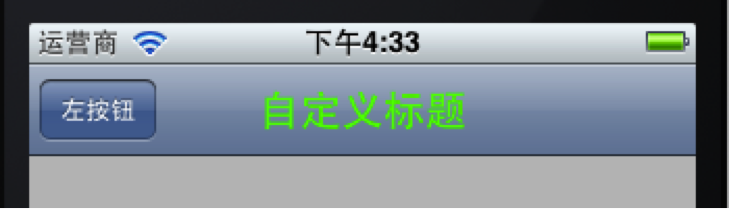
4、自定义标题,设置titleView:
如果我们想改变标题的颜色和字体,就需要自己定义一个UILabel,并且已经设置好这个Label的内容,可以设置自己想要的字体、大小和颜色等。然后执行self.navigationItem.titleView = myLabel;就可以看到想要的效果。
4.1 打开ViewController.h,向其中添加属性:
@property (strong, nonatomic) UILabel *titleLabel;
4.2 打开ViewController.m,在@implementation ViewController下面一行添加代码:
@synthesize titleLabel;
4.3 在viewDidLoad方法中,去掉self.navigationItem.title = @"标题";,并添加代码:
//自定义标题
titleLabel = [[UILabel alloc] initWithFrame:CGRectMake(0, 0 , 100, 44)];
titleLabel.backgroundColor = [UIColor clearColor];  //设置Label背景透明
titleLabel.font = [UIFont boldSystemFontOfSize:20];  //设置文本字体与大小
titleLabel.textColor = [UIColor colorWithRed:(0.0/255.0) green:(255.0 / 255.0) blue:(0.0 / 255.0) alpha:1];  //设置文本颜色
titleLabel.textAlignment = UITextAlignmentCenter;
titleLabel.text = @"自定义标题";  //设置标题
self.navigationItem.titleView = self.titleLabel;
运行:
实际上,不仅仅可以将titleView设置成Label,只要是UIView的对象都可以设为titleView,例如,将4.3中的代码改成:
UIButton *button = [UIButtonbuttonWithType: UIButtonTypeRoundedRect];
[button setTitle: @"按钮" forState: UIControlStateNormal];
[button sizeToFit];
self.navigationItem.titleView = button;
则运行起来效果如下:

5、为Navigation Bar添加左按钮
以下是进行leftBarButtonItem设置的代码:
self.navigationItem.leftBarButtonItem = (UIBarButtonItem *)
self.navigationItem.leftBarButtonItems = (UIBarButtonItem *)
self.navigationItemsetLeftBarButtonItem:(UIBarButtonItem *)
self.navigationItemsetLeftBarButtonItem:(UIBarButtonItem *) animated:(BOOL)
self.navigationItemsetLeftBarButtonItems:(NSArray *)
self.navigationItemsetLeftBarButtonItems:(NSArray *) animated:(BOOL)
其实很简单,只要定义好一个UIBarButtonItem,然后执行上述某行代码就行了。
5.1 为了使得运行时不出错,我们在ViewController.m中添加一个空方法,由将要创建的左右按钮使用:
//空方法
-(void)myAction {

}
5.2 添加一个左按钮:
在ViewDidLoad方法最后添加代码:
//添加左按钮
UIBarButtonItem *leftButton = [[UIBarButtonItem alloc]
                                        initWithTitle:@"左按钮"
                                        style:UIBarButtonItemStylePlain
                                        target:self
                                        action:@selector(myAction)];
[self.navigationItem setLeftBarButtonItem:leftButton];
运行效果如下:
创建一个UIBarButtonItem用的方法主要有:
[UIBarButtonItemalloc]initWithTitle:(NSString *) style:(UIBarButtonItemStyle) target:(id) action:(SEL)
[UIBarButtonItemalloc]initWithBarButtonSystemItem:(UIBarButtonSystemItem) target:(id) action:(SEL)
在第一个方法中,我们可以使用的按钮样式有:
UIBarButtonItemStyleBordered
UIBarButtonItemStyleDone
UIBarButtonItemStylePlain
效果分别如下:


看上去第一个和第三个样式效果是一样的。
6、添加一个右按钮
在ViewDidLoad方法最后添加代码:
//添加右按钮
UIBarButtonItem *rightButton = [[UIBarButtonItem alloc]
                                initWithBarButtonSystemItem:UIBarButtonSystemItemUndo
                                target:self
                                action:@selector(myAction)];
self.navigationItem.rightBarButtonItem = rightButton;
运行如下:

这里创建UIBarButtonItem用的方法是
[UIBarButtonItemalloc]initWithBarButtonSystemItem:(UIBarButtonSystemItem) target:(id) action:(SEL)
用了系统自带的按钮样式,这些样式的标签和效果如下:
| 标签 | 效果 | 标签 | 效果 |
| UIBarButtonSystemItemAction |  |
UIBarButtonSystemItemPause |  |
| UIBarButtonSystemItemAdd |  |
UIBarButtonSystemItemPlay |  |
| UIBarButtonSystemItemBookmarks |  |
UIBarButtonSystemItemRedo |  |
| UIBarButtonSystemItemCamera |  |
UIBarButtonSystemItemRefresh |  |
| UIBarButtonSystemItemCancel |  |
UIBarButtonSystemItemReply |  |
| UIBarButtonSystemItemCompose |  |
UIBarButtonSystemItemRewind |  |
| UIBarButtonSystemItemDone |  |
UIBarButtonSystemItemSave |  |
| UIBarButtonSystemItemEdit |  |
UIBarButtonSystemItemSearch |  |
| UIBarButtonSystemItemFastForward |  |
UIBarButtonSystemItemStop |  |
| UIBarButtonSystemItemOrganize |  |
UIBarButtonSystemItemTrash |  |
| UIBarButtonSystemItemPageCurl |  |
UIBarButtonSystemItemUndo |  |
注意,UIBarButtonSystemItemPageCurl只能在Tool Bar上显示。
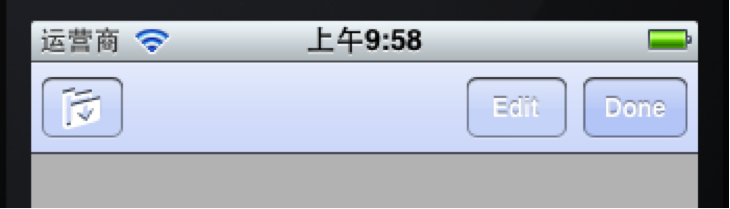
7、添加多个右按钮
在ViewDidLoad方法中最后添加代码:
//添加多个右按钮
UIBarButtonItem *rightButton1 = [[UIBarButtonItem alloc]
                                initWithBarButtonSystemItem:UIBarButtonSystemItemDone
                                target:self
                                action:@selector(myAction)];
UIBarButtonItem *rightButton2 = [[UIBarButtonItem alloc]
                                 initWithBarButtonSystemItem:UIBarButtonSystemItemFixedSpace
                                 target:nil
                                 action:nil];
UIBarButtonItem *rightButton3 = [[UIBarButtonItem alloc]
                                 initWithBarButtonSystemItem:UIBarButtonSystemItemEdit
                                 target:self
                                 action:@selector(myAction)];
UIBarButtonItem *rightButton4 = [[UIBarButtonItem alloc]
                                 initWithBarButtonSystemItem:UIBarButtonSystemItemFlexibleSpace
                                 target:nil
                                 action:nil];
UIBarButtonItem *rightButton5 = [[UIBarButtonItem alloc]
                                 initWithBarButtonSystemItem:UIBarButtonSystemItemOrganize
                                 target:self
                                 action:@selector(myAction)];
NSArray *buttonArray = [[NSArray alloc]
                        initWithObjects:rightButton1,rightButton2,
                        rightButton3,rightButton4,rightButton5, nil];
self.navigationItem.rightBarButtonItems = buttonArray;
为了更好的显示效果,把设置titleView以及设置leftBarButtonItem的代码注释掉,运行效果如下:

上面的UIBarButtonSystemItemFixedSpace和UIBarButtonSystemItemFlexibleSpace都是系统提供的用于占位的按钮样式。
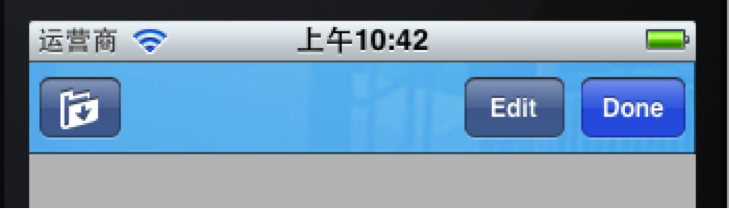
8、设置Navigation Bar背景颜色
在viewDidLoad方法后面添加代码:
//设置Navigation Bar颜色
self.navigationController.navigationBar.tintColor = [UIColor colorWithRed:(218.0/255.0) green:(228.0 / 255.0) blue:(250.0 / 255.0) alpha:1];
运行如下:
9、设置Navigation Bar背景图片
首先将准备好作为背景的图片拖到工程中,我用的图片名称是title_bg.png。
将上面的代码改成:
//设置Navigation Bar背景图片
UIImage *title_bg = [UIImage imageNamed:@"title_bg.png"];  //获取图片
CGSize titleSize = self.navigationController.navigationBar.bounds.size;  //获取Navigation Bar的位置和大小
title_bg = [self scaleToSize:title_bg size:titleSize];//设置图片的大小与Navigation Bar相同
[self.navigationController.navigationBar
     setBackgroundImage:title_bg
     forBarMetrics:UIBarMetricsDefault];  //设置背景
之后,在ViewController.m中添加一个方法用于调整图片大小:
//调整图片大小
- (UIImage *)scaleToSize:(UIImage *)img size:(CGSize)size{
    UIGraphicsBeginImageContext(size);
    [img drawInRect:CGRectMake(0, 0, size.width, size.height)];
    UIImage* scaledImage = UIGraphicsGetImageFromCurrentImageContext();
    UIGraphicsEndImageContext();
    return scaledImage;
}
运行:


发表评论

-
【iOS】iOS应用程序状态切换相关
2012-08-16 12:58 1859一、iOS应用程序状态机一共有五种状态: 1. Not ... -
【iOS】WebView的使用
2012-08-16 12:55 19021、使用UIWebView加载网页 运行XCode 4 ... -
【iOS】正确使用PresentModalViewController
2012-08-16 12:54 1509Present ViewController Mo ... -
【iOS】appdelegate中的方法
2012-08-16 12:51 12861、- (void)applicationWillRes ... -
【iOS】iOS消息推送机制的实现
2012-08-14 14:10 2943原文地址:http://www.cnblogs.com/ ... -
【iOS】init,loadView,viewDidLoad加载关系
2012-08-13 14:47 4396一、loadView 永远不要主动调用这个函数。vie ... -
【iOS】屏幕旋转,屏幕自适应方向变化
2012-07-12 16:39 77731. iOS有四个方向的旋转,为了保证自己的代码能够支持 ... -
【编程工具】Xcode4中代码补全(Code Completion)失效的解决方案
2012-07-05 15:16 1643原文地址:http://www.1mima.com/?p=14 ... -
【Objective-C】iOS开发中常见的语句@synthesize obj=_obj的意义详解
2012-07-05 13:46 16992我们在进行iOS开发时,经常会在类的声明部分看见类似于@ ... -
【iOS】iPhone系统常用文件夹位置
2012-07-04 14:01 3371iPhone系统常用文件夹位� ... -
【iOS】iOS开发中常用的几个功能代码
2012-07-04 13:51 20351、如果在程序中想对某张图片进行处理的话(得到某张图片的一部分 ... -
【iOS】iOS工程中的info.plist文件的完整研究
2012-07-04 13:22 1884我们建立一个工程后,会在Supporting files ... -
【iOS】读取plist文件
2012-06-29 17:07 1626在Xcode中建立一个iOS项目后,会自己产生一个.pli ... -
【iOS】 UIFont 设置字体 与字体效果预览
2012-06-20 16:15 6499原创地址:未知 转载地址:http://blog.cs ...
相关推荐
ios的app的navigation bar的代码的实现。
IOS7Navigation Bar上的返回按钮文本颜色,箭头颜色以及导航栏按钮的颜色设置
在iOS5.0以上版本,要想navigation bar上面也能显示木质图片,要更改“WoodUINavigationAppDelegate.m”文件的一段代码:[navigationController.navigationBar insertSubview:imageView atIndex:0];改成:...
自定义导航条上面返回按钮(backbutton)的文字和颜色,以及自定义导航条的颜色和图片。 注意:请在Mac下解压使用
ios词典源码,关于navigation bar 和bar button item的运用。
用swift写的一个UINavigationBar的扩展,总结可3种隐藏UINavigationBar的方式,代码的github下载地址:https://github.com/631106979/WCLHideNavBar,代码详解的博客地址:...
自定义UINavigationBar。自定义导航条的按钮,包括增加按钮、segments等等。在导航条左边、中间、右边增加按钮或其他控件。 注意:请在Mac下解压使用
YPNavigationBarTransition 功能齐全的UINavigationBar框架,使条形过渡更加自然! 您无需调用任何UINavigationBar api, ...纯色条支持设置导航条背景颜色 背景图片栏支持设置导航栏背景图片 更新的导航栏风格
30. Implementing iOS 10 TableView Navigation using Storyboards in Xcode 8 31. Working with the iOS 10 Stack View Class 32. An iOS 10 Stack View Tutorial 33. An iOS 10 Split View Master-Detail Example ...
(2)Navigation-Based Application:其特点是使用navigation controller,而navigation controller使用navigation bar来控制多级视图; (3)Tool Bar Application:程序的底部有一个工具条,利用工具条中的按钮来...
Implementing iOS 8 TableView Navigation using Storyboards in Xcode 6 Chapter 30. An iOS 8 Split View Master-Detail Example Chapter 31. Implementing a Page based iOS 8 Application using ...
一个完全可定制的跨平台(React Native Navigation Bar)组件。 在浏览了包含的导航栏之后,我发现了这个项目,但没有找到任何跨平台的,可定制的和集成状态栏的项目。 这个项目是 (我自然而然地)的精神继任者(我...
导航条(Navigation Bar)Navigation Menu 导航条(Navigation Bar)之Menu on NavigationBar 导航条类--iOS更换皮肤 导航条之Breadcrumb View 导航条之NavBarNotificationView 导航条之NavigationController ...
这个源码案例是一个下滚动列表的navigation bar效果,源码JDFPeekaboo,JDFPeekaboo能够帮助实现在往下滚动列表的时候能够藏起navigation bar,这是一种很常用的需求,相信可以帮助很多同学。
yarn add curved-bottom-navigation-bar # or npm install curved-bottom-navigation-bar 链接本机代码: React Native> = 0.60:链接是自动的。 React本机<0.60 react-native link curved-bottom-navigation-...
Navigation Bar 102 Toolbar 105 Tab Bar 106 Content Views 108 Popover (iPad Only) 108 Split View (iPad Only) 111 Table View 113 Text View 121 Web View 122 Container View Controller 123 Alerts, Action ...
滑动导航视图(Navigation Bar)控件,源码SKSlideViewController,SKSlideViewController是一个简单易用的,滑动导航视图控件,可进行简单的设置和调整,该源码的操作很简单的。 SKSlideViewController is an easy ...
titled_navigation_bar:切换所选项目时,带有平滑动画的漂亮而简单的底部导航栏
一、Navigation Bar 使用navigationbar的时候遇到如下的问题 1.navigation bar的底部有一条黑线 本意做一个bar的颜色和页面颜色一致的页面。只有顶部有两个其他按钮的时候。发现bar的底部有一条黑线。导致bar不能很...